Category: Gardening

  • How To Start A Garden From Seed

    How To Start A Garden From Seed

    Would you like to learn how to start a garden from seed?

    Growing your own food is one of the most rewarding experiences and it’s a lot easier than you think. I will be sharing the supplies needed to get started, helpful tips and answering some frequently asked questions along the way.

    This post contains affiliate links, which means I make a small commission at no extra cost to you. 

    Supplies

    Step 1

    Bring a pot or kettle of water to a boil. Place your seed starter potting mix inside of your bucket & pour the boiling water in, mixing as you go. You want to make sure you only add enough water to dampen the soil and kill any insect eggs inside of your potting mix. Let it sit, until it’s cool enough to work with.

    Step 2

    Going through your seed packets, decide what seeds you’d like to start. Be sure to check the back of the package for more in-depth planting information. For example: when to start your seedlings, how deep to plant them and spacing, for when you plant them into your garden.

    Step 3

    Fill your seedling starter trays or nursery pots with the dampened soil. Do not pack the soil down. This light weight soil gives the seeds an easy time growing roots with its spongey softness. After your trays are all filled to the top, be sure to tap them on your table to allow any air pockets to fill with soil.

    Step 4

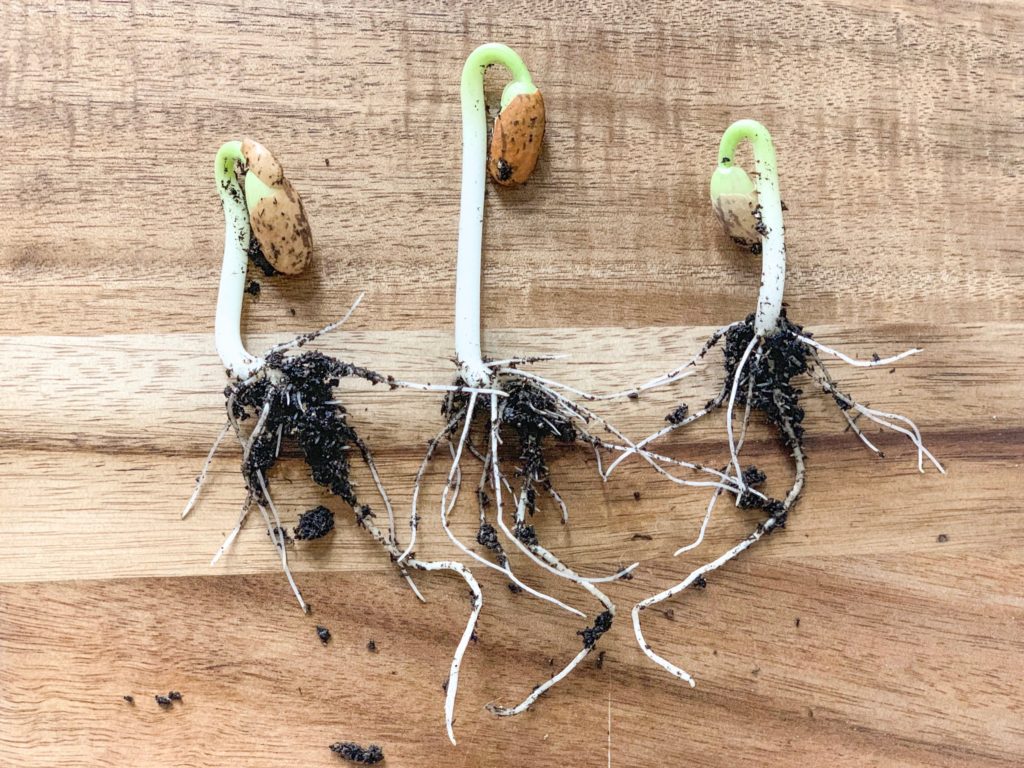
    Begin making indentations in the soil with your finger tips or a pen/pencil to plant your seedlings in. Depending on there germination rate, plant 1-3 seeds in each hole. *Keep in mind, if they all germinate you will have to kill off all but 1 healthy plant. Or you can always thin them out once they are a little more established. What I mean by that is, carefully separating each plant into its own container.

    Step 5

    Now cover your seeds with the remaining seed starter soil and place them inside your plant growing trays. This is how you will be watering your seeds. Place a quarter inch to 1/2 inch of water into your plant growing tray and allow the soil some time to soak up the water. Dump out any remaining water and place your trays under a LED grow light.

    Step 6

    As a general rule we water our seedlings once a week. If they look dried out or wilted we will water them more often. Following the directions on the back of your fertilizer, fertilize your plants approximately once every two weeks.

    PIN IT FOR LATER!!!

  • How To Start A Garden With What You Already Have

    How To Start A Garden With What You Already Have

    Our kitchens are full of fruits and vegetables that can help you get started growing a garden today.

    Most of the food we buy on a weekly bases gets used up and any scraps or left overs are tossed in the trash! What if I told you that you could create a garden using up those scraps, that you likely would’ve thrown out.. I’m here to tell you that YOU CAN! I have listed a few examples below, that can help you get started with your garden today.

    Lettuce

    Romaine lettuce heads are a great option! To get started cut the lettuce using up the leafs. Instead of throwing out the bottom, simply place it in a small dish of water and watch it grow over the next few weeks. Harvesting the greens as you need them. What I love most about lettuce is how easy it is to grow and the returning leaves it continues to provide.

    Green Onions

    If you happen to have any green onions in your fridge, with roots still intact, then you can regrow them. Place the white part of the onion & roots in a small glass of water. Harvest as needed & watch them grow!

    Basil & Rosemary

    Basil is a great rooting plant! If you have a few stems, pluck off the lower leaves and place the stem in water. In a matter of days you’ll see roots forming. Rosemary is another great rooting herb, simply do the same. Plucking any lower leaves and placing the stem in water.

    Carrots Greens

    Did you know you can regrow carrots greens in water? Assuming you buy full carrots and not baby carrots. Cut the tops off, placing them in water and in a matter of days you’ll watch there little green leaves reappear. I have never done this but I’ve heard carrot top greens go well in a salad bowl. Makes since because I do love a few diced carrots in my salad for extra color and flavor.

    Celery

    A lot like lettuce, celery will regrow just by placing the bottom in a small dish of water. Celery will take longer than lettuce to grow back its full stalks, but it’s very resourceful and fun for kids to watch.

    Onions

    I have regrown onions two ways but because of a full schedule, I never fully followed through with either, but I am excited to this year. If you have onions that have gown way past there prime for cooking and are shooting out greenery from the top, I have good news! Don’t throw them away, simply place them in a pot covering them with soil and in a few months you’ll be amazed at the beautiful white flower the emerges holding lots of new onion seeds. We did this last year and now I’m kicking myself for not collecting the seeds.

    If you are working with cookable onions don’t worry, I have a way that you too can regrow them. Save there bottoms and place them in a small dish containing just enough water to cover the roots. I have heard that you should let them dry out a day or two before placing the roots into water, but I was a little too impatient. I’ll keep you posted on the progress. Once the onion starts making great growth, you can plant them into your garden and await your new onions.

    Garlic

    Is another great option. Take a bulb of garlic that is starting to grow and separate each clove. Space them evenly apart and watch them grow. Harvest when all the leaves look like they have died off.

    Potatoes

    Have you ever grabbed a bag of potatoes expecting to use them for dinner, only to realized they have grown a little too old to use? I hope I’m not the only one who forgets to use there’s potatoes. This year we will be planting a few potatoes in the ground (I’ve heard they do well planting in March with the colder temperatures, because they are under the ground safe from any frosts) and seeing how many potatoes we can grow for our family.

    A Little Family Experiment

    Chad and I (him more than me) eat a lot of organic lunchbox peppers. He enjoys them with hummus and I make a delicious pepper chicken cabbage wrap. A few weeks ago Chad saved approximately 30 seeds and decided to try growing lunchbox pepper plants from those seedlings. We are currently overloaded with pepper plants. I may not have done the best job at labeling all the plants during there repotting, but we will definitely be doing more planting from seeds that we harvest from store bought foods. Some examples could be tomatoes, peppers, melons and squashes.

    Share Your Kitchen Garden Regrowth Stories With Us Below!

    PIN IT FOR LATER!!!

  • How To Plant A Fruit Tree

    How To Plant A Fruit Tree

    How to plant a fruit tree in 5 easy steps. A step by step photo tutorial for planting fruit trees.

    Planting fruit trees is one of the best investments for your homestead and in my opinion one of the first steps in cultivating a sustainable lifestyle. Before planting that beautiful vegetable garden I hope you will consider adding fruit trees to your landscape. I know we regret not planting our fruit trees sooner!

    This post contains affiliate links, which means I make a small commission at no extra cost to you.

    Using a pick axe or shovel start digging.

    First you’ll want to consider proper sunlight, wind protection and irrigation. Keep in mind the saying “out of site, out of mind.” Once you have your new trees location, start digging. Using a pick axe or shovel dig a hole 2 to 3 times wide and deeper than the pot it came in.

    Mix 50% native soil with 50% composted mulch.

    Mix 50% native soil with 50% composted mulch. Mix well. Partially back fill hole with 50/50 mixture, so that the tree sits on top of soft and healthy soil. Sprinkle 1 tbsp Myco Bliss Organic Mycorrhizal Fungi (5 Endo Mycorrhizae Species Mix) for Plants (Powder, 2 lb) on top of 50/50 mixture.

    Sprinkle 1 tbsp mycorrhiza.

    Take the tree out of its pot and place on top of mycorrhiza + 50/50 soil mixture. Make sure that the top of the tree soil is level with the ground soil before back filling the hole.

    Add a 2 inch layer of compost, few handfuls azomite, and few handfuls of worm castings

    Back fill with the remaining 50/50 soil mixture. In no specific order add a 2 inch layer of compost, few handfuls Root Naturally Azomite Rock Dust – 10 Pounds, and few handfuls of Wiggle Worm WWSB30LB Unco Industries Builder Worm Castings, 30 lb Compost, Soil, 30-Pound. Then add approximately 6 inches of mulch. Anything will do, grass clippings, wood chips, pine needles or leaves. Be sure to keep mulch away from the trees trunk.

    With leftover dirt make a well or berm around the trees drip line.

    With leftover dirt make a well or berm around the trees drip line(Furthest tree branches). You’ll want to water your tree right away with 4 times the amount of water then the pot it came in. For example, if your tree came in a 5 gallon pot, then it needs 20 gallons of water. We also like to add 1 oz of Neptune’s Harvest FS191 Hydrolized Fish & Seaweed at the time of watering.

    Pin it for later!!!

    What fruit trees will you add first?

  • Cheap & Easy DIY Raised Bed Garden

    Cheap & Easy DIY Raised Bed Garden

    Considering a raised bed garden? Below we share why we decided building a raised garden bed was the best option for growing vegetables.

    Benefits Of A Raised Bed Garden

    There are many benefits to raised bed gardening. Some of the benefits include lifting your plants off the ground for easier access, keeping people from walking on your garden which packs down the soil, and making it harder for critters to reach your plants. You also have more growing options since you will now have great soil to begin with.

    Step 1: Choose A Location

    The most important part of choosing a location is making sure they will get adequate amounts of sunlight. I chose to put my raised bed on the southern facing side of my house for the best sun exposure. Make sure the location of your raised beds are level and smooth. It doesn’t have to be perfect, but you want to make sure your water goes throughout the bed evenly and doesn’t pool up anywhere. We rented a roto til to help break up the ground where our raised garden beds would be placed.

    Step 2: Preparing the soil.

    Preparing the soil for gardening can be tricky and if you live in an area with poor soil quality like we do, it’s not likely you’ll yield a harvest anytime soon. It is important to make sure your soil has all the nutrients your plants will need to survive. I used a pre packaged raised garden bed mix, since it is ready to go and makes life easy. This is the brand I recommend, Kellogg 3-cu ft Organic Raised Bed and Potting Mix.

    Step 3: Raised bed

    We decided to build our raised beds 8 ft. x 4 ft. with a 12 inch depth, which gives us plenty of growing room. It is recommended to build your raised bed a minimum of 6 inches deep, but the deeper the better. You want to make sure to fill your beds up with soil, until there is approximately 2 inches of wood left at the top. Don’t pack your soil tightly. Raised garden beds help keep the soil soft since there is no foot traffic, allowing roots to easily grow deep.

    Step 4: Supplies

    Below is a list of materials you need to create a cheap & easy DIY raised garden bed. If you already have some of these items on hand then you can cut down on the price of each bed and create more raised beds in your garden. One raised garden bed cost approximately $150 with soil.

    3 Top Choice 2 x 12 x 8 Douglas Fir Lumbar $11.63 each

    24 “L” shape Galvanized Corner Brace $2.98 each

    1 box of 1 1/2 in Course Drywall Screws $6.97 or whatever screws you already have on hand.

    10 Raised Bed & Potting Mix Bags, 3-cu ft. $9.98 each

    Step 5: Assembly

    First you’ll want to cut one of your 2 x 12 x 8’s in half. You should now have two 2 x 12 x 4’s and two 2 x 12 x 8’s. Make a rectangle with your boards and assemble the brackets on the inside. You can move your raised bed to desired location and begin filling with soil.

    Pin It For Later!!!