Category: Chickens

  • Chicken Victory Garden

    Chicken Victory Garden

    How to create a chicken victory garden and cut back on feed.

    Our hens love lots of treats! So much so that I can’t walk outside without feeling guilt if I don’t have anything in hand for them. Our girls come running as soon as I walk outside, but they know it’s treat time when I whistle. I’ve tried planting many different plant varieties for treats in the past but they wipe them out before the plants even get a chance to establish themselves.

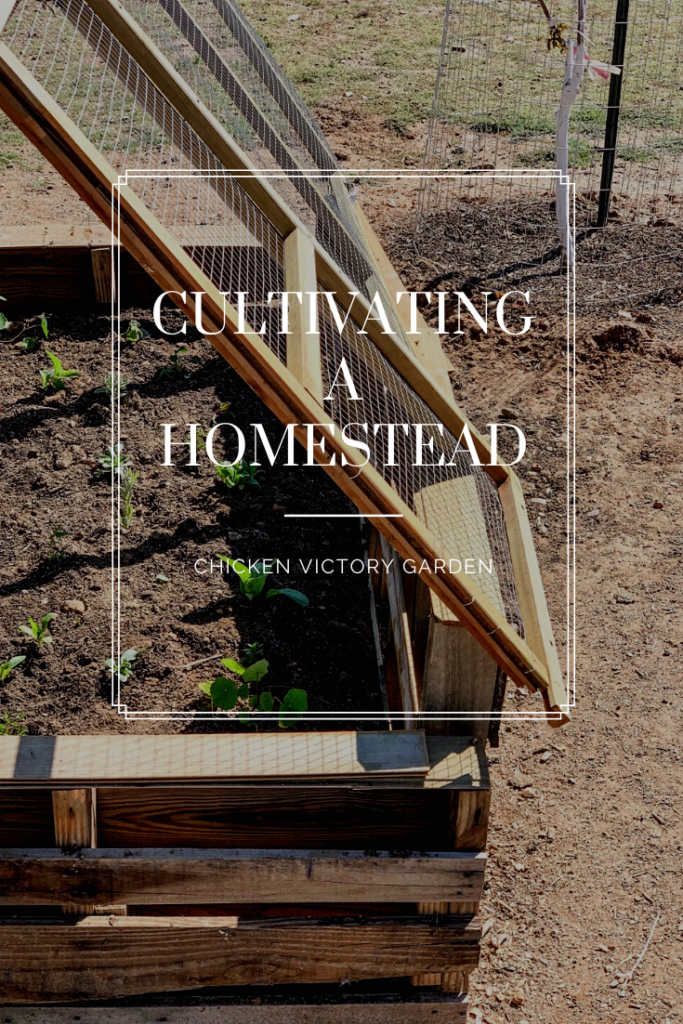
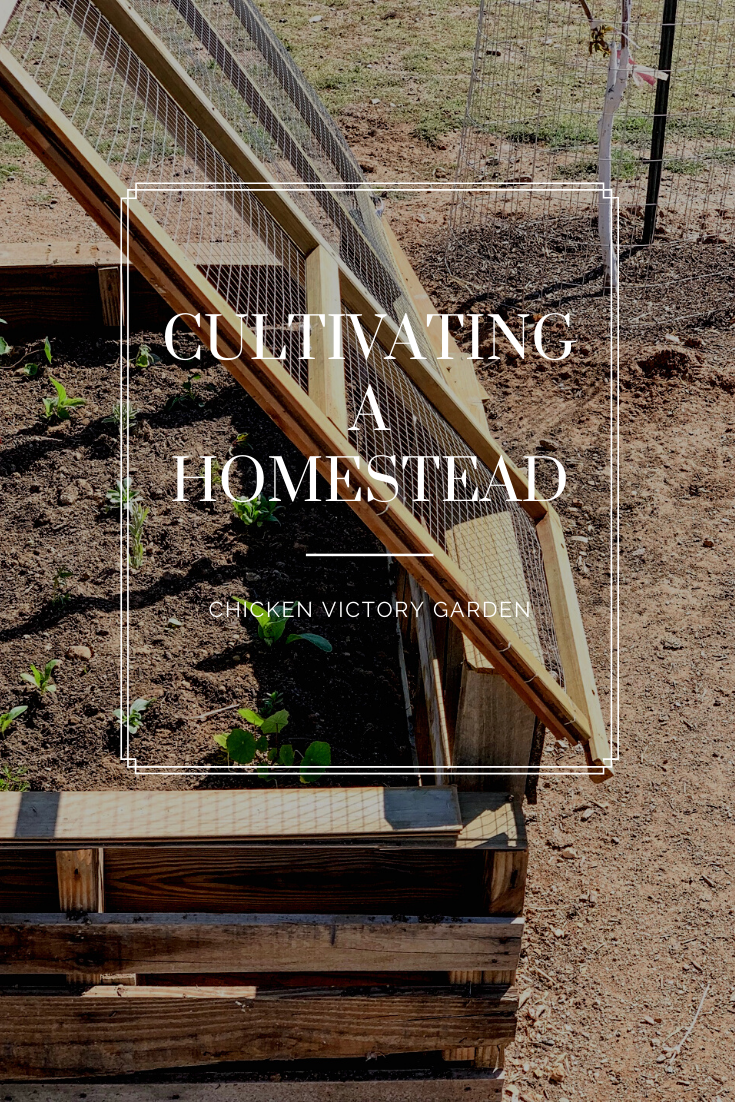
    I wanted to be able to grow beautiful plants around their coop without them getting ahold of them and killing them. Even a strong & well established plant would be wiped out in a day. I decided I would need to make some sort of raised bed with chicken wire to keep them from wiping the plants out completely.

    It was also very important to me to use what we already had on hand to create their raised bed garden. We had a lot of old pallets piled up in the backyard I knew would make great scrap wood for this project. Instead of taking the boards apart, I had Chad cut them in half for me to create a large raised bed.

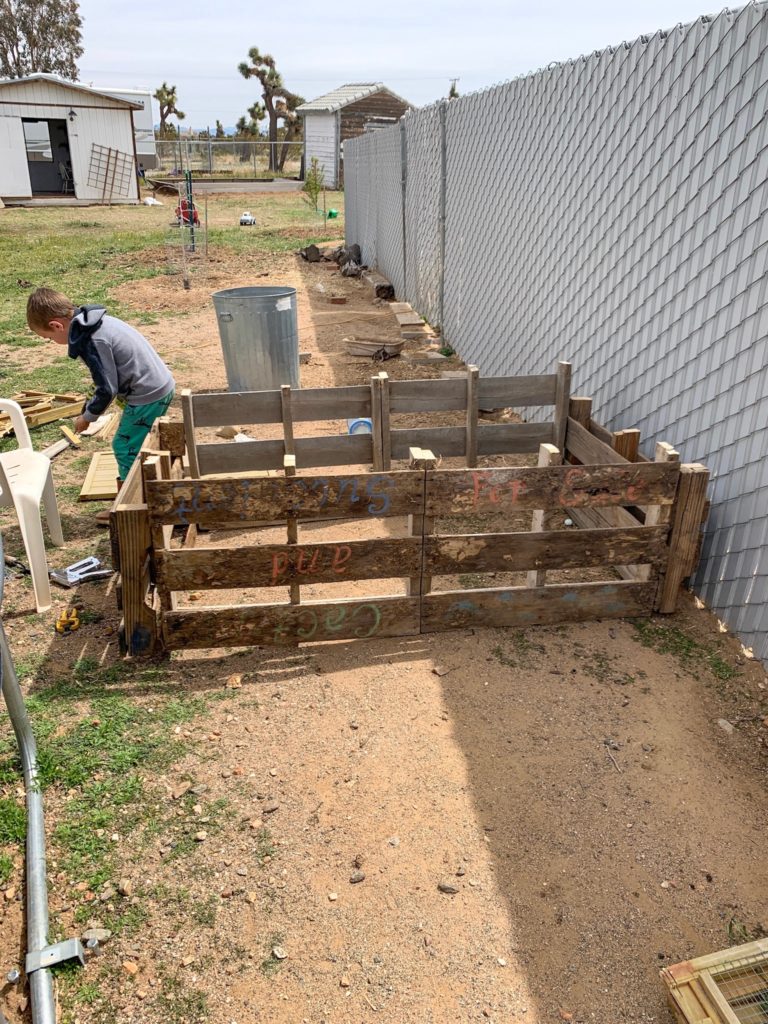
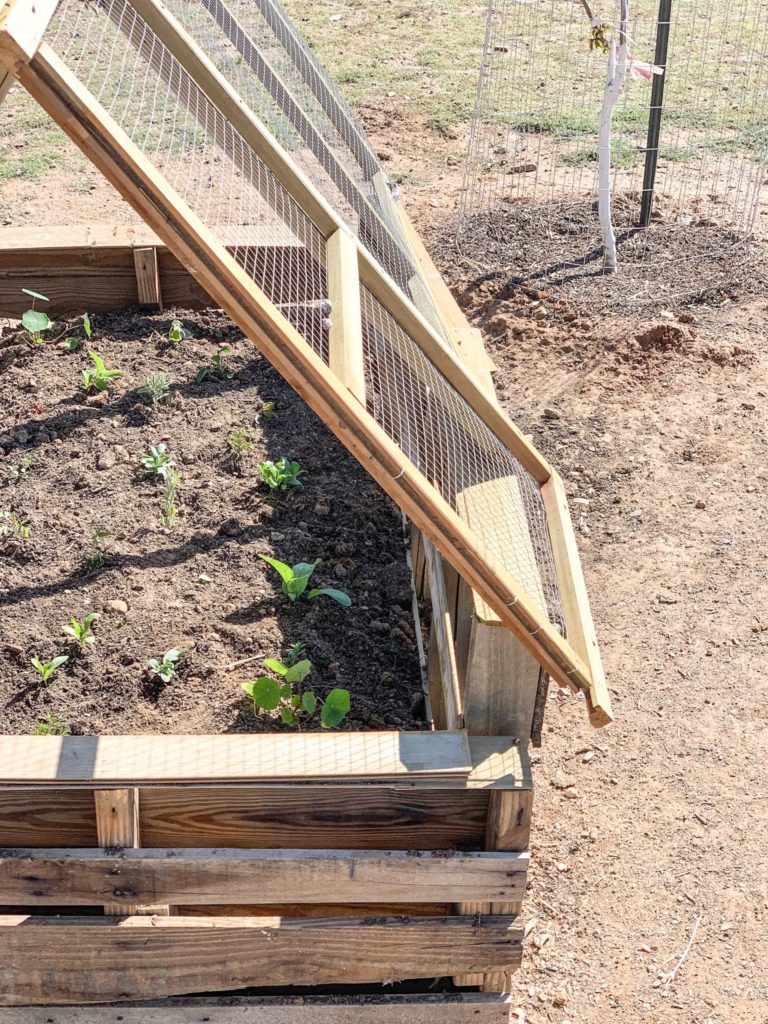
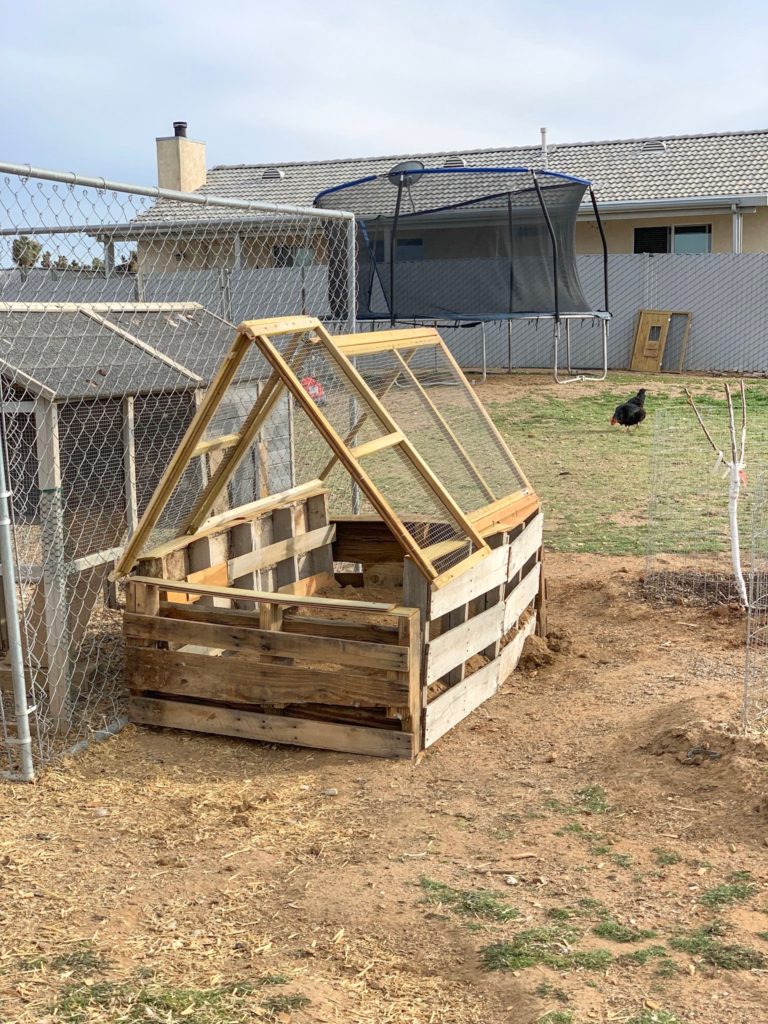
    After cutting 3 pallets in half and screwing them together to create the bottom of the raised bed. I decided to pull a few more pieces of scrap wood from the pile, that already had wire attached, from an old chicken coop that feel apart. I tested a few different ways I could attach these pieces to create a raised bed that would grow healthy plants, but also keep the chickens from destroying the plants completely. This house shape was my absolute favorite, it’s like a little chicken greenhouse.

    I took a few pieces with wire already attached and overlapped them to create a house effect. I hammered a few nails & screws to hold it in place. Making sure there was an opening for me to pull weeds and harvest the hens treats daily, I started planting lavender, candela, nasturtiums, tomatoes, zinnias, kale, beets, carrots, lettuce and even some borage for the bees. Then I covered the two sides with more chicken wire.

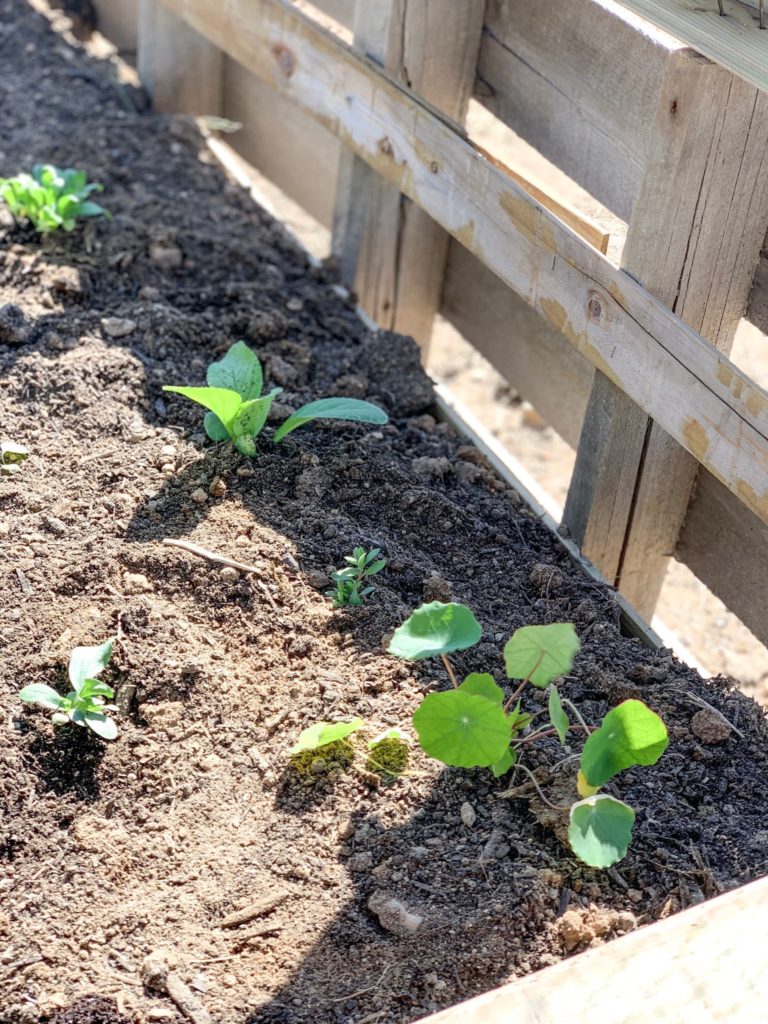
    In order to ensure the plants could grow I had to secure the sides with wire too, so that the hens wouldn’t destroy them them right away. Now I can harvest as much or little as I’d like daily to spoil them. It also makes a beautiful addition to the chicken coop area. I do plan on adding more herbs as well as sprouting grains to there diet this summer, but please tell me in the comments below, what treats do your hens enjoy?

    PIN IT FOR LATER!!!

  • How to sell your farm fresh eggs

    How to sell your farm fresh eggs

    Having trouble selling your extra eggs? Today I’m sharing how to sell your farm fresh eggs and create a list of returning customers.

    There are a number of ways you can sell your farm fresh eggs. Including regular eating eggs, hatching eggs or incubating them yourself to sell chicks. I have tried just about everything and became frustrated with how hard it is to make profit off our chickens.

    This post contains affiliate links, which means I make a small commission at no extra cost to you.

    Today I want to share one of the ways I’m able to fund our homestead by selling farm fresh eggs. I’ve tried selling a half or full dozen eggs at a time and found it hard to gain consistent buyers. When I had an extra few dozen I would ask around, but usually they already went to the store. We also live outside the city and people didn’t care to make the drive out just for eggs. I found myself offering to drop them off, but with 3 kiddos it wasn’t always worth it.

    I thought about how nice it would be if we could just cover the cost of feed.

    We feed our hens an organic feed and that quickly adds up with 19 hens plus a rooster. I became discouraged as I went into the feed store continually to pick up feed, beading and treats. I thought about how nice it would be if we could just cover the cost of feed. We may not be paying for eggs but our feed bill was adding up quickly.

    For most it’s much easier to pick up a dozen or two at the store then purchase from a local farmer. There are those few who don’t mind going out of their way to get locally sourced farm fresh organic eggs. I just feel like they are often hard to find in your homesteading journey. At least in the beginning.

    I think this could be the secret to making a profit off your extra eggs.

    FARM FRESH EGGS HOW TO SELL

    I decided to test another approach to selling our farm fresh eggs. I think this could be the secret to making a profit off your extra eggs. First is selling more than one dozen at a time. Considering the eggs you get from the store can be up to 3 months old. Where as you collect eggs daily. I’d say its safe to collect a few dozen before offering them to your customers.

    Next consider where you want to spend your profit. I want to be able to feed my hens without having to take it out of our personal account. Most backyard chicken farmers live in an area with a lot of greenery. Their chickens are able to forage, allowing them to feed their flock for little or no costs. We on the other live in the desert so that’s a lot harder for us to do. I’d much rather the money we spend on organic feed go towards building up another aspect of our homesteading life.

    selling your farm fresh eggs

    Most family and friends that buy your eggs aren’t buying them because they are better for them.

    Now that I know I’d like to cover the costs of feed I can market my eggs around that idea. Most family and friends that buy your eggs aren’t buying them because they are better for them. Rather that they are supporting YOU and what your doing for your family. I decided to test this theory out. I asked if they’d be interested in getting organic farm fresh eggs in return for a Tractor Supply gift card, to help us pay for our costs of feed.

    They also care a great deal about connivance.

    As much as people love to buy food that’s local, fresh and nourishing to their bodies. Ultimately they care more about supporting you and what your doing for your family! They also care a great deal about convenience. Driving back and forth each week for a dozen eggs doesn’t seem worth the extra effort. Especially when most of us already have full of schedules.

    backyard chickens selling your farm fresh eggs

    I offered my close friends and family 6 dozen eggs in return for a $25 Tractor Supply gift card. Then I briefly shared how we would love to be able to cover some of the costs of our organic feed. I now have a list of customers waiting for our hens to lay 6 dozen eggs. You could offer 3 dozen or even 10 dozen. Depending on how big or small your flock is and how much they are laying.

    Sharing your why helps make it easier for them to support you.

    Family and friends are often the first to support you in whatever it is your working on. For us its growing our homestead and small farm. Sharing your why helps make it easier for them to support you. Although don’t forget to save some eggs for your own family! That’s why you got chickens in the first place.

    If you found this post helpful, I’d love for you to share it on your Pinterest feed and with your backyard farming friends!

    PIN IT FOR LATER!!!

  • How To Get Started With Baby Chicks

    How To Get Started With Baby Chicks

    Are you thinking about adding chicks to your backyard? Below I share how to care for baby chicks and the supplies need.

    How to care for baby chicks and the supplies needed

    In my opinion chicks are the gateway to homesteading. We’ve all tried things like growing our own herbs, making soap soap or learning the art of bread making, but I believe there’s something about raising baby chicks and collecting your own eggs, that gets the homestead going.

    This post contains affiliate links, which means I make a small commission at no extra cost to you.

    Step #1 Plan Ahead

    The best thing you can do is plan ahead. How safe will they be in your yard? We have had our dog, coyotes and other predators attack our whole flock. It’s best to choose a location that is gated in, from personal experience I recommend the backyard. Consider building a gated area for them away from your dog and other predators, even if they are in a locked cage. Work on all fencing repairs before purchasing your chicks.

    Step #2 Housing

    Where will your flock live? Will they be free range or will you set up a cage and chicken run? We started out small and grew as our flock did. This is the cheapest way to start out. If you have the extra funds and know you would like to have a large flock down the road, it’s better to invest in a larger coop right off the bat. We have 3 coops linked together through a chicken run and this works great for us.

    Step #3 Purchasing Your Chicks

    When we first started out, I purchased our chicks at Tractor Supply. I have purchased from our local feed store and online. I like to purchase different breeds for a more colorful carton of eggs. There are a lot of websites to order from and you may even want to consider purchasing hatching eggs to incubate yourself.

    Step #4 Brooding Box

    For the first few days we left them in a large cardboard box. I quickly realized that wasn’t going to work long term. They soaked the pine shavings and box in a few hours. The feed was also tipping and being wasted. I decided to try using a large dog cage we had on hand. The bottom removable tray made it easy for clean up and I could place a small box of pine shavings away from there food and water reducing waste.

    Step #5 The Supplies

    • Housing: A cardboard box, storage container or dog cage.
    • A heat lamp
    • Food and water containers
    • Pine shavings
    • Chick starter (feed)

    Step #6 Clean Up

    Baby chicks are pretty easy to care for. Keeping there housing clean is very important for happy healthy chicks. Place your chicks temporarily in a small box, make sure they can’t get out. Empty their food, water and all the old pine shavings. Rinse everything with a hose. Spray simple green then rinse again for a cleaner smelling cage. Dry and refill with pine shavings. Tip: I like to place the pine shavings in a small box inside there cage to prevent them from making a large mess.

    That’s it really. A clean heated environment along with food and water is all they need for the first few weeks. Make sure to only feed them starter feed. It’s easy to get excited and want to feed them special treats but their little bodies can only handle starter feed at the moment. Watch for any signs of “pasty butt” and treat it immediately to prevent loosing any baby chicks.

    Once they start to get there feathers and look like teenagers, I call them. I move them to the garage. They tend to be too messy to keep indoors. When cleaning out their cage, let them run around to stretch their legs and get familiar with their new home. After about 8 weeks and depending on the weather, your chicks are ready to be placed in there back yard coop.

    PIN IT FOR LATER!!!

    I hope you found this post helpful! Be sure to tag me in all your baby chick photo’s on Instagram! I love seeing these sweet little babies.