Author: Tara Philipp

  • How To Turn An Old Shed Into A She Shed

    How To Turn An Old Shed Into A She Shed

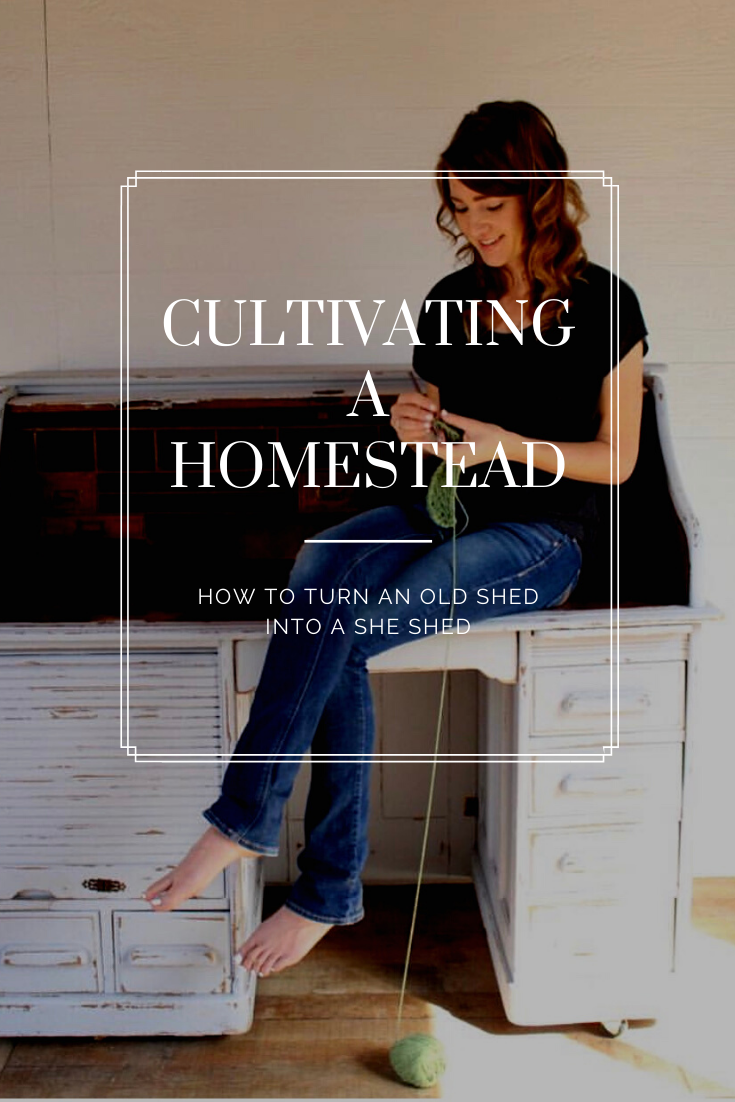
    I’m sharing how we turned an old backyard shed full of junk into my new She Shed, with before and after photo’s.

    She Shed’s have became increasingly popular for the stay at home mama who needs to escape the house to get some work done. Over the last few years I have tried finding a balance of creating a small business while I stay at home with my babies. This has been a pretty difficult task at times. I shared a craft room with my kids playroom. (I know not the smartest place to store my projects.) As you can imagine it was difficult to keep it clean and keep the kids from playing with my work.

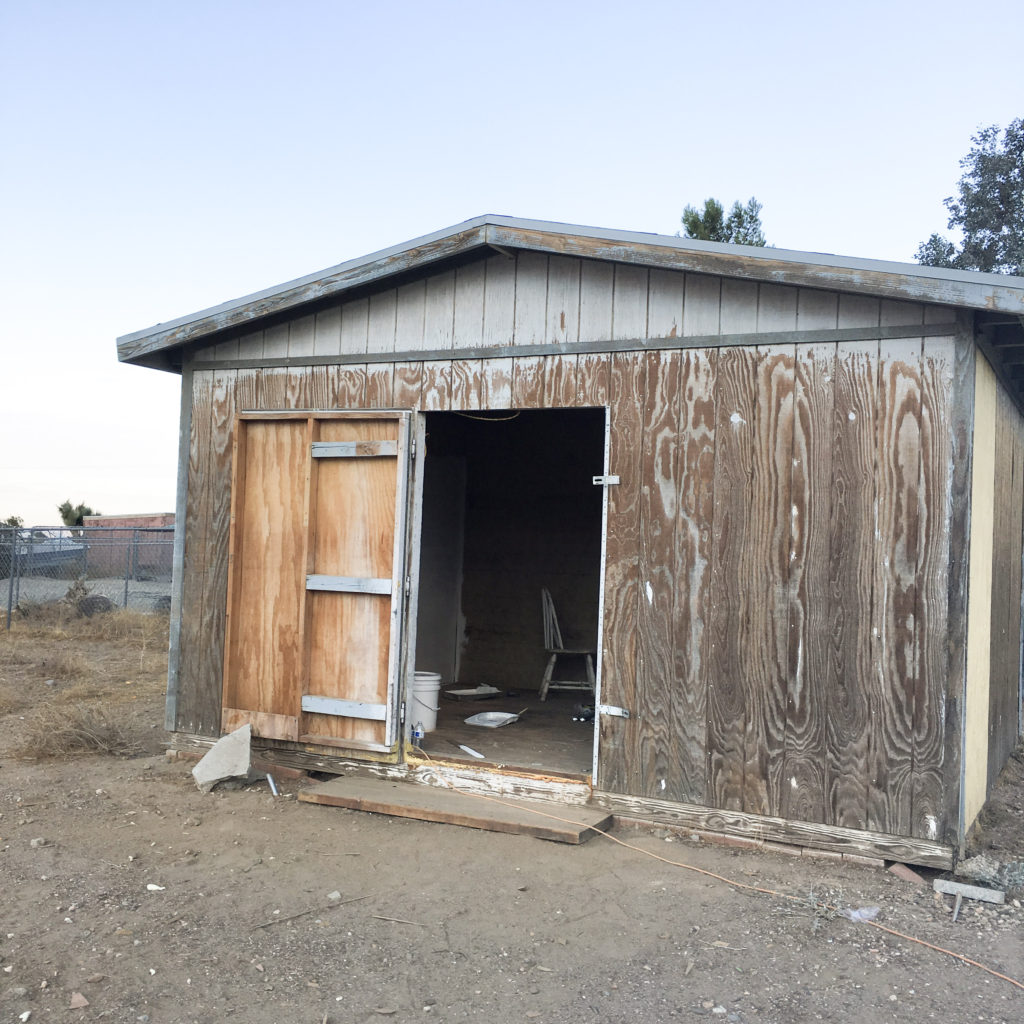
    Scrolling through social media one day I saw an Instagram mama working in her she shed and thought maybe one day I could have a beautiful space like that to call my own! I quickly realized there were two old sheds in my backyard full of junk. I entertained the thought of one of them potentially becoming my she shed and went outside to investigate.

    As a creative person I saw so much potential! My husband on the other hand thought I was totally crazy to think I would want to work in a spider infested shed instead of our temperature controlled house. I instantly began working on cleaning out the shed. Dreaming up what it might look like after it was finished.

    What to look for when considering turning an old shed into a work space.

    A strong structure is the first and most important step. You don’t want to be working in a potentially dangerous shed! Please make sure the structure is in great condition and you are able to easily fix any problem areas.

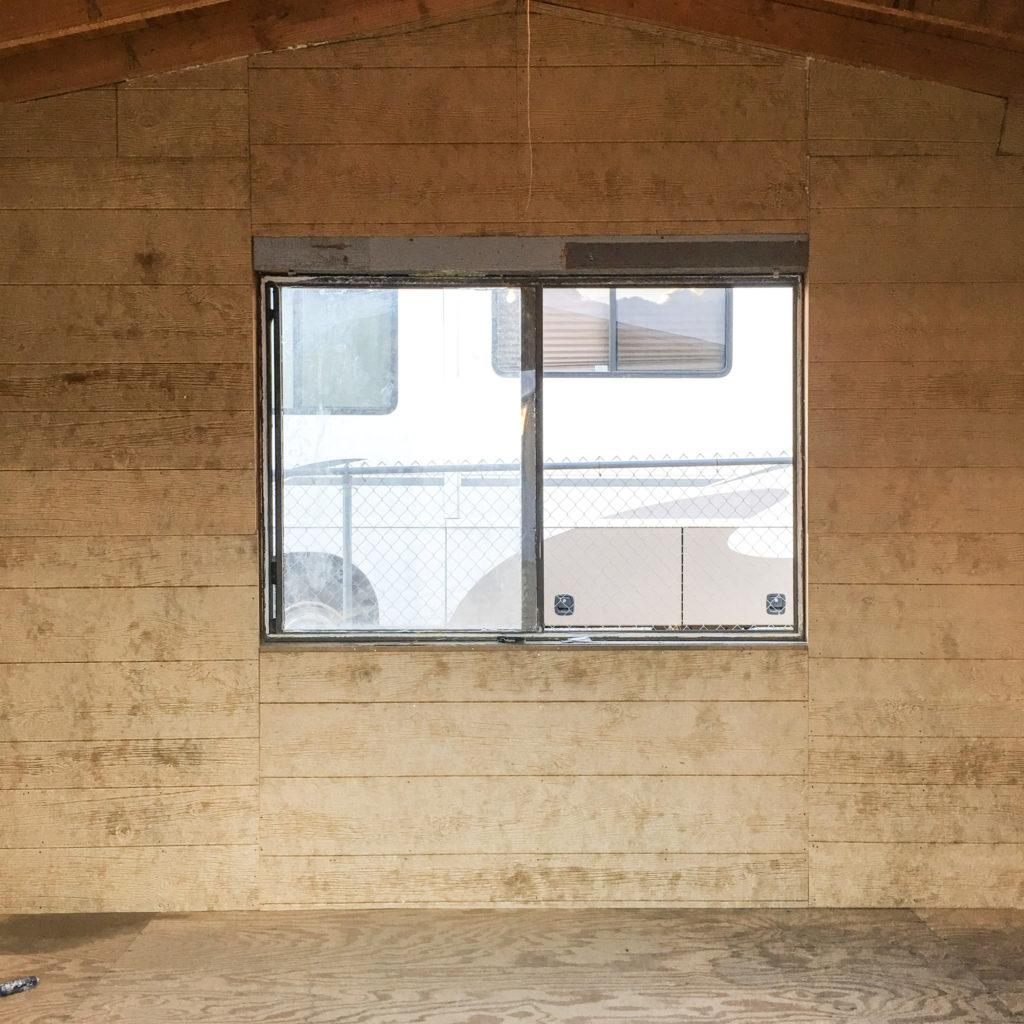
    Make a list of any repairs and what you need to get the job done . An example a window in our shed had been broken before we bought the house and needed to be fixed. There was also a panel on the outside that needed to be replaced to keep the weather and bugs out.

    Getting Started

    Start by cleaning out everything in the shed. Re-home anything you want to keep and create a dump pile for the things you don’t want. P.S: Keep an eye out for any furniture you can re-purpose and use in your she shed. Then measure all your walls, floor and window(s). With a list of repairs, measurements and supplies needed, walk around your local hardware store like Home Depot or Lowes and calculate the costs. I know for me I always underestimate the amount of money put into a project.

    We knew I’d need a window, 1 outside panel (plywood), insulation for better climate control, interior walls, paint, paint brushes, flooring, nails, cocking foam for gaps, and an electric sander.

    Repairs

    I recommend starting with any repairs needed to keep the weather and bugs out. We started by fixing the outside panel and window. The window we bought didn’t fit and to save money from a custom made window, we decided to use plexy glass as a quick fix. This doesn’t bother me, as I know it’s just a shed and it gets the job done nicely with little cost.

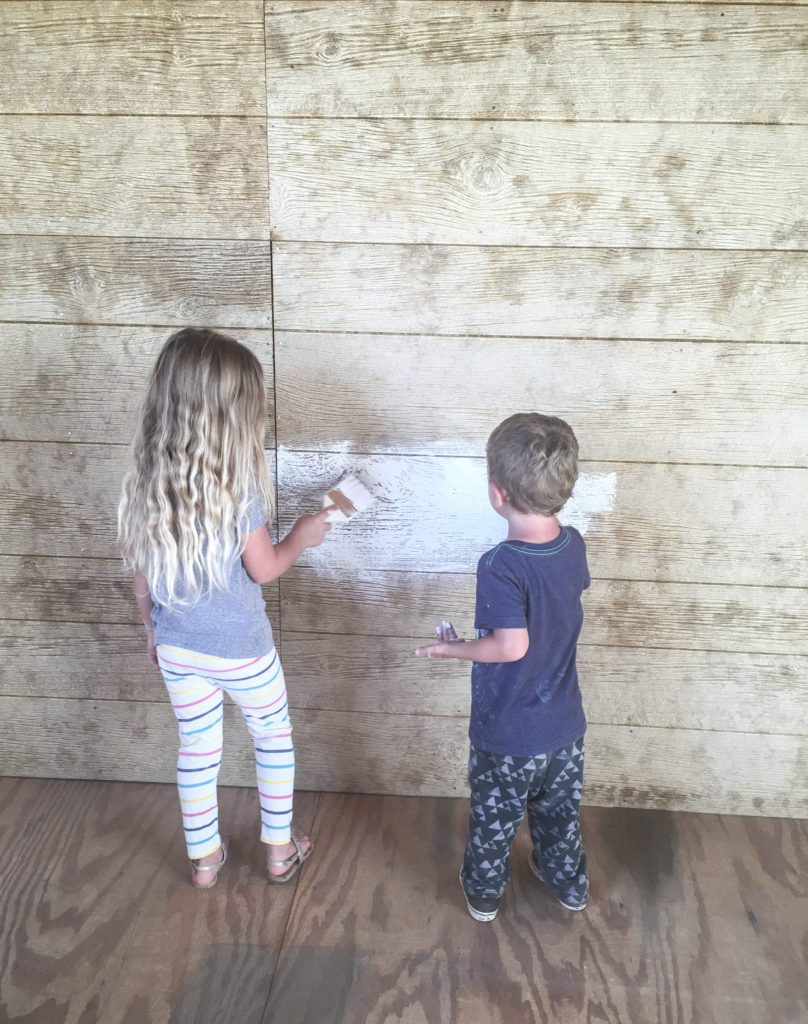
    Next, the interior walls. Using a face mask, gloves and safely glasses, install the insulation. This is optional but recommended for climate control. For our walls I decided on shiplap plywood. This gave me the farmhouse look I wanted.

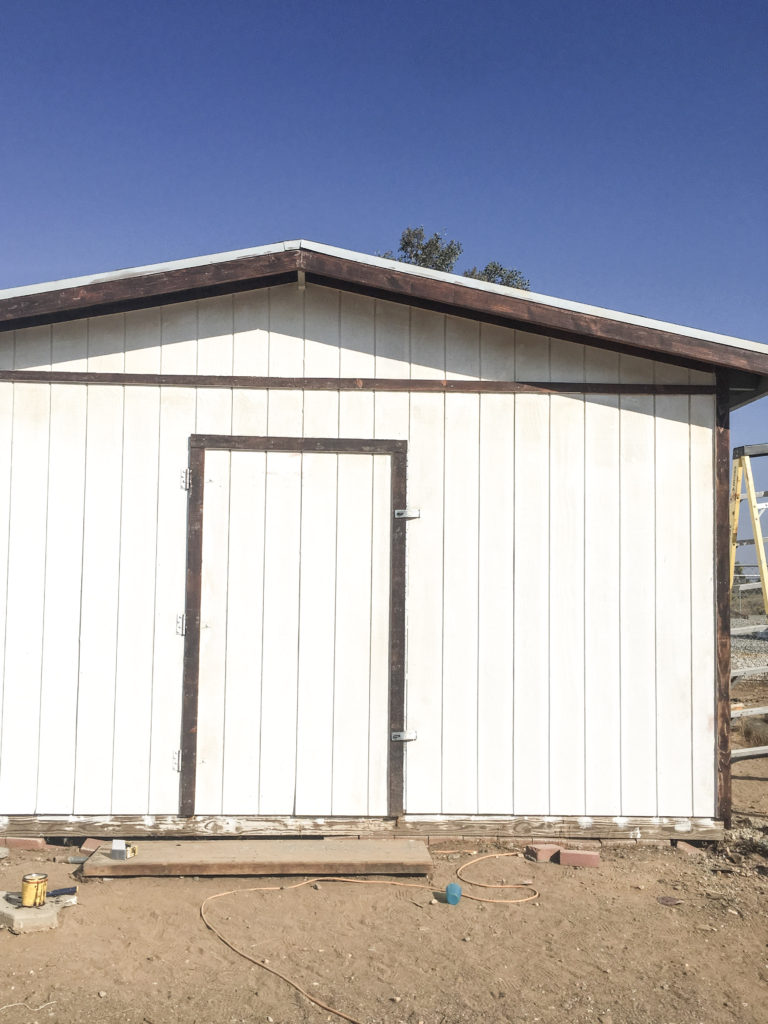
    Do your best to get your panels to fit but don’t worry to much about gaps. It is a shed after all. We used cocking foam to fill in the corners and gaps. After all your walls are up you can begin painting, don’t forget about the exterior as well. I waited to do the floors last, so that no paint dripped on them.

    Designing your space.

    Now it’s time for the best part decorating! You also might want to consider a small space heater, ceiling fan or swamp cooler. My shed already had a ceiling fan and I just open the window, during the summer to allow a drift. During winter, when it’s not too cold I will head out to my she shed with a space heater to work on a few projects.

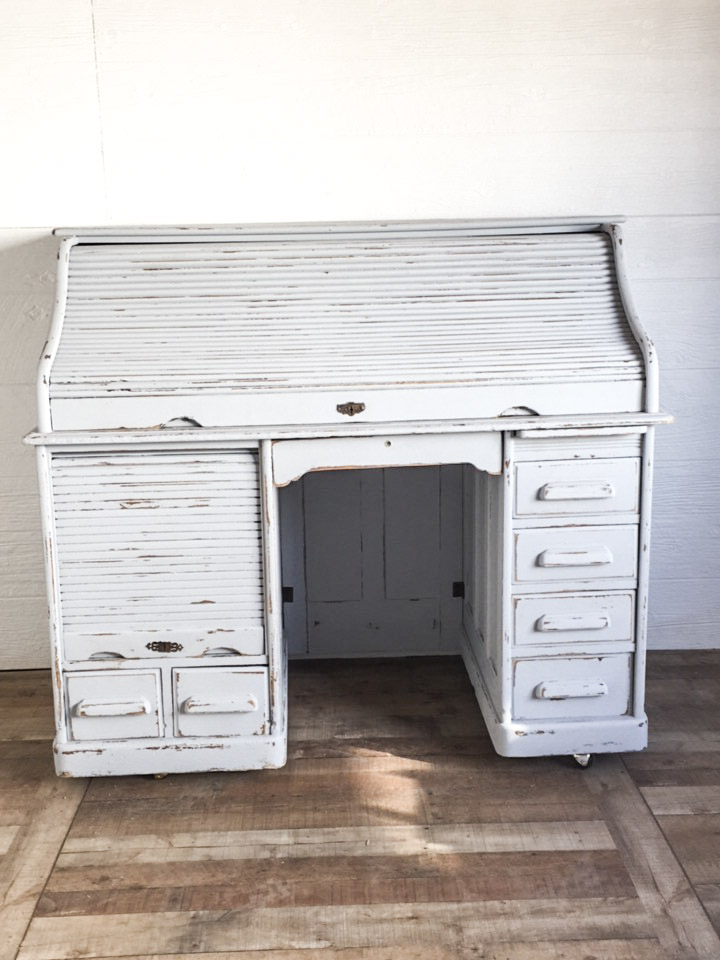
    For furniture and decor I highly recommend thrift stores or items you already have in your home and aren’t using. My desk was a $15 thrift store find that I painted with homemade chalk paint I already had on hand. A lot of the decor in my shed are pieces from my house I wasn’t using.

    Let me know in the comments below if you found this post helpful and if you plan to create a she shed of your own.

    PIN IT FOR LATER!!!

  • 7 Ways To Cultivate A Homestead

    7 Ways To Cultivate A Homestead

    I’m sharing 7 easy ways you can cultivate a homestead and a lifestyle of self- sufficiency.

    7 ways to cultivate a homestead

    Do you desire to live as naturally as possible and want to learn how you can utilize the space and resources available to you? Today I’m sharing 7 ways you can cultivate a homestead.

    This post contains affiliate links, which means I make a small commission at no extra cost to you.

    Food From Scratch

    Let’s think about what your family eats in a week or month. How often are you eating out or reaching for packaged processed food? Start small! Scale back on the number of times you eat out and instead pack a lunch to go. The key to this is planning ahead. If you know you’ll be away from the house all day, then packing a lunch or picking up some healthy options at the store are a great idea.

    Instead of ordering pizza with friends or meeting at a local restaurant try planning to hang out at your house and make a easy dish like spaghetti or chicken alfredo. You can even plan ahead the night before by making an extra dinner for lunch tomorrow.

    If you are meeting at family or a friends house, you can stop by a grocery store on the way. Look for something that will go far and everyone will like. Salad, broccoli cheddar soup, chicken and veggies, tacos, or sandwiches.

    Next lets look at the foods you reach for regularly, are they processed snacky foods? Instead of chips and dip try making homemade salsa or grab some peppers and hummus. Incorporate more fruits and veggies, no bake energy bars or nut and seed mixes. This is easier if you mostly shop the perimeter of the store.

    Fermented Foods

    Fermented foods like sourdough, sourkraut, yogurt and kombucha are fairly easy and great for gut health. Sourdough starter is my personal favorite. You can make anything from sourdough bread to pizza crust, pancakes, english muffins, flat bread, cinnamon rolls and more.

    Sourkraut, yogurt and other fermented foods are full of yummy gut healthy probiotics your body needs to improve digestion. Fermented foods can also boost your immune system, plus aid in maintaining a healthy weight. Fermenting can seem overwhelming but I encourage you to try it out and see how easy it truly is to ferment your own food. Start with something you know your family will love, for us that was bread.

    Grow Your Food

    I know not everyone has access to gardening and growing there own food. You may live in apartment complex or maybe you know nothing about gardening and keeping a plant alive. My advice, again start small. Try a few herbs in your window seal.

    Another great way to grow your own food that requires no gardening experience or soil is sprouting seeds. You can pick up a mason jar sprouting kit at your local health food stores or order them online. Things like broccoli, sunflower shoots, micro greens, bean sprouts or salad mixes are easy and quick.

    Growing indoors under an LED light is also a great option for those with little room and no prior gardening experience. Place your plants or seed starters under a grow light and watch them thrive. I recommend starting with salad mixes.

    Chickens

    If you have any land at all and are able too, I highly recommend getting chickens. You can get full grown chickens from your local feed store if you don’t want to wait for them to start laying. I started with baby chicks from tractor supply, with no prior experience. There are plenty of amazing resources available to teach you everything thing you need to know. Pinterest was a big help for us when we came across anything we were unsure of.

    backyard chickens homestead 7 ways

    Milking

    Now that we have dipped our feet into homesteading, raising chickens and growing our own vegetables, we are moving onto milking animals. I have always wanted to own a cow but right now that is unrealistic for our family. We are doing our research on goats and the different milking breeds available.

    Consider your families milk needs and if you will be able to put the time and attention into caring for a milking goat. You’ll want to consider housing and feed costs. It’s easy to obtain the animals needed for a homestead but not as easy to upkeep them. Also be sure to consider vacation time and hiring someone to care for your homestead while you are away.

    Handmade Home

    This one is actually one of my favorite aspects of a homesteading lifestyle. Think Pinterest! You know all those pretty pins you have saved, go through them and start digging into different hobby’s. Things like crochet, knitting sewing, candles, soap making, embroidery, and weaving.

    I like to crochet washcloths for our kitchen and bathrooms. If you have a milking goat consider making cheese, lotion or soap. Embroidery makes great gifts or decor as well as weaving.

    From The Wild

    You may have to get very creative here but its definitely doable. I like to take cuttings of eucalyptus and olive trees to use in arrangements around the house when there aren’t any fresh flowers available. There are a number of things you can make with dandelions. Like syrup, salves, soap, tea, infused oil or honey. Speaking of honey, bees are a great addition to the homestead. They require little work and provide your family with a regularly used sweetener for the homestead.

    If you enjoy yarn crafts you can use nuts and plants to dye your yarn. Collect herbs and vegetables depending where you live. Fishing or hunting. Even bugs are usually pretty easy to find and make great feed for chickens and ducks. Start a mealworm farm or simply collect caterpillars from the garden and feed to your flock.

    PIN IT FOR LATER!!!

  • How To Get Started With Baby Chicks

    How To Get Started With Baby Chicks

    Are you thinking about adding chicks to your backyard? Below I share how to care for baby chicks and the supplies need.

    How to care for baby chicks and the supplies needed

    In my opinion chicks are the gateway to homesteading. We’ve all tried things like growing our own herbs, making soap soap or learning the art of bread making, but I believe there’s something about raising baby chicks and collecting your own eggs, that gets the homestead going.

    This post contains affiliate links, which means I make a small commission at no extra cost to you.

    Step #1 Plan Ahead

    The best thing you can do is plan ahead. How safe will they be in your yard? We have had our dog, coyotes and other predators attack our whole flock. It’s best to choose a location that is gated in, from personal experience I recommend the backyard. Consider building a gated area for them away from your dog and other predators, even if they are in a locked cage. Work on all fencing repairs before purchasing your chicks.

    Step #2 Housing

    Where will your flock live? Will they be free range or will you set up a cage and chicken run? We started out small and grew as our flock did. This is the cheapest way to start out. If you have the extra funds and know you would like to have a large flock down the road, it’s better to invest in a larger coop right off the bat. We have 3 coops linked together through a chicken run and this works great for us.

    Step #3 Purchasing Your Chicks

    When we first started out, I purchased our chicks at Tractor Supply. I have purchased from our local feed store and online. I like to purchase different breeds for a more colorful carton of eggs. There are a lot of websites to order from and you may even want to consider purchasing hatching eggs to incubate yourself.

    Step #4 Brooding Box

    For the first few days we left them in a large cardboard box. I quickly realized that wasn’t going to work long term. They soaked the pine shavings and box in a few hours. The feed was also tipping and being wasted. I decided to try using a large dog cage we had on hand. The bottom removable tray made it easy for clean up and I could place a small box of pine shavings away from there food and water reducing waste.

    Step #5 The Supplies

    • Housing: A cardboard box, storage container or dog cage.
    • A heat lamp
    • Food and water containers
    • Pine shavings
    • Chick starter (feed)

    Step #6 Clean Up

    Baby chicks are pretty easy to care for. Keeping there housing clean is very important for happy healthy chicks. Place your chicks temporarily in a small box, make sure they can’t get out. Empty their food, water and all the old pine shavings. Rinse everything with a hose. Spray simple green then rinse again for a cleaner smelling cage. Dry and refill with pine shavings. Tip: I like to place the pine shavings in a small box inside there cage to prevent them from making a large mess.

    That’s it really. A clean heated environment along with food and water is all they need for the first few weeks. Make sure to only feed them starter feed. It’s easy to get excited and want to feed them special treats but their little bodies can only handle starter feed at the moment. Watch for any signs of “pasty butt” and treat it immediately to prevent loosing any baby chicks.

    Once they start to get there feathers and look like teenagers, I call them. I move them to the garage. They tend to be too messy to keep indoors. When cleaning out their cage, let them run around to stretch their legs and get familiar with their new home. After about 8 weeks and depending on the weather, your chicks are ready to be placed in there back yard coop.

    PIN IT FOR LATER!!!

    I hope you found this post helpful! Be sure to tag me in all your baby chick photo’s on Instagram! I love seeing these sweet little babies.

  • Cheap & Easy DIY Raised Bed Garden

    Cheap & Easy DIY Raised Bed Garden

    Considering a raised bed garden? Below we share why we decided building a raised garden bed was the best option for growing vegetables.

    Benefits Of A Raised Bed Garden

    There are many benefits to raised bed gardening. Some of the benefits include lifting your plants off the ground for easier access, keeping people from walking on your garden which packs down the soil, and making it harder for critters to reach your plants. You also have more growing options since you will now have great soil to begin with.

    Step 1: Choose A Location

    The most important part of choosing a location is making sure they will get adequate amounts of sunlight. I chose to put my raised bed on the southern facing side of my house for the best sun exposure. Make sure the location of your raised beds are level and smooth. It doesn’t have to be perfect, but you want to make sure your water goes throughout the bed evenly and doesn’t pool up anywhere. We rented a roto til to help break up the ground where our raised garden beds would be placed.

    Step 2: Preparing the soil.

    Preparing the soil for gardening can be tricky and if you live in an area with poor soil quality like we do, it’s not likely you’ll yield a harvest anytime soon. It is important to make sure your soil has all the nutrients your plants will need to survive. I used a pre packaged raised garden bed mix, since it is ready to go and makes life easy. This is the brand I recommend, Kellogg 3-cu ft Organic Raised Bed and Potting Mix.

    Step 3: Raised bed

    We decided to build our raised beds 8 ft. x 4 ft. with a 12 inch depth, which gives us plenty of growing room. It is recommended to build your raised bed a minimum of 6 inches deep, but the deeper the better. You want to make sure to fill your beds up with soil, until there is approximately 2 inches of wood left at the top. Don’t pack your soil tightly. Raised garden beds help keep the soil soft since there is no foot traffic, allowing roots to easily grow deep.

    Step 4: Supplies

    Below is a list of materials you need to create a cheap & easy DIY raised garden bed. If you already have some of these items on hand then you can cut down on the price of each bed and create more raised beds in your garden. One raised garden bed cost approximately $150 with soil.

    3 Top Choice 2 x 12 x 8 Douglas Fir Lumbar $11.63 each

    24 “L” shape Galvanized Corner Brace $2.98 each

    1 box of 1 1/2 in Course Drywall Screws $6.97 or whatever screws you already have on hand.

    10 Raised Bed & Potting Mix Bags, 3-cu ft. $9.98 each

    Step 5: Assembly

    First you’ll want to cut one of your 2 x 12 x 8’s in half. You should now have two 2 x 12 x 4’s and two 2 x 12 x 8’s. Make a rectangle with your boards and assemble the brackets on the inside. You can move your raised bed to desired location and begin filling with soil.

    Pin It For Later!!!