Author: Tara Philipp

  • Artisan Sourdough Bread Recipe

    Artisan Sourdough Bread Recipe

    Simple Sourdough Bread

    Adding sourdough bread to your menu allows you to reap its flavorful benefits and can lead to better digestion. Baking 2-3 times a week helps maintain a happy and active starter, allowing you to bake all of your families favorites!

    Sourdough bread can quickly become overwhelming, when you first start out. This recipe was created to help simplify the process and bring about a delicious loaf, that will inspire you to continue learning and baking with your sourdough starter!

    Ingredients:

    3 cups flour

    1 1/2 cups filtered water

    1/2 cup active sourdough starter

    1 tsp salt

    Directions:

    1. Activate/feed your starter around 8:30 a.m.
    2. Around 12:30 p.m. mix your ingredients- flour, filtered water, sourdough starter, and salt. Place a damp tea towel on top, and let the dough sit at room temperature for 1 hour.
    3. Over the next 4 hours, you’ll preform “stretch and folds.” This will help activate the gluten, and strengthen the dough, making it easier to work with. {Note: The dough will be very sticky. It might be helpful to wet your hands, before working with the dough.} Every hour, you’ll want to scoop one side of the dough, lifting and folding it back onto itself. Stretch and fold all four sides of the dough. Let it sit for 1 hour before the next set of stretch and folds. Cover with a damp tea towel.
    4. It’s about 5:30 and you should be done with your stretch and folds. The next step is known as the bulk fermentation process. You will be placing your dough in the fridge to allow the yeast and bacteria to slowly continue to work though the dough, creating a light and airy loaf.
    5. Generously flour your bread banneton. Place your dough into the floured banneton, cover with a plastic bag and place in the fridge overnight.

    The next day!

    1. Preheat oven to 500 with dutch oven.
    2. Remove your dutch oven, from the oven. Place on your stovetop, and remove the lid.
    3. Remove your dough from the fridge. Gently remove your dough from the banneton, by flipping it out onto a piece of parchment paper, carefully.
    4. Score your loaf. Using a sharp knife or razor, make one long slice through the dough, straight down the middle.
    5. Place your loaf in the dutch oven, with the parchment paper. Add the lid and bake at 500 for 20 minutes.
    6. Remove the lid to your dutch oven and drop the temperature to 450 degrees, for approximately 20 minutes. {Note: You can add a cookie sheet underneath your dutch oven, to prevent the bottom of your crust, from burning.}
    7. Remove the dutch oven, from the oven and turn oven off.. Add the loaf back to the oven on a rack and crack the oven door. This will allow the loaf to cure, giving you that crispy crackle within the crust.
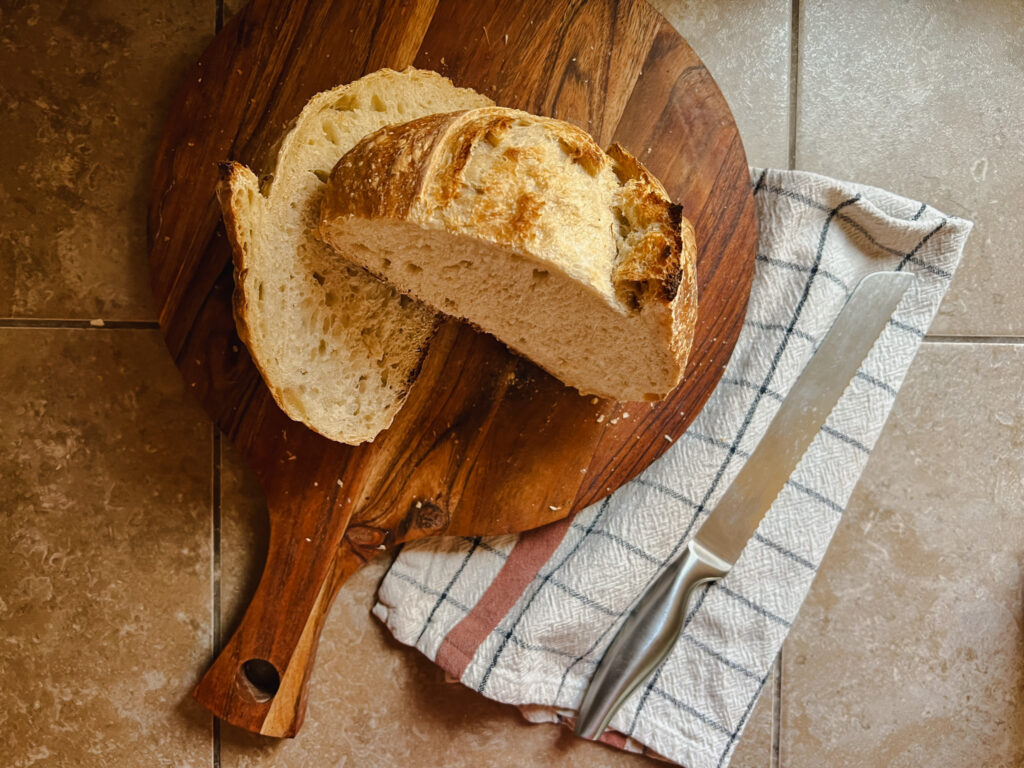
    8. As tempting as it is, do not slice into your loaf until it’s fully cooled.
    9. ENJOY!
  • Farmers Almanac

    Farmers Almanac

    Grow Saffron – The World’s Most Expensive Spice In Your Garden

    Saffron is a beautiful spice that brings flavor to countless dishes and recipes. But did you know that you can grow your own saffron? In the world of gardening, there’s a hidden treasure waiting to be discovered – saffron, the most valuable spice in the world.

    Luxurious Appeal of Saffron

    Saffron’s culinary expertise is legendary, with its alluring aroma and distinctive flavor elevating dishes to celestial heights. A pinch of these golden threads transforms a simple rice dish into a luxurious saffron-infused paella or imparts an unparalleled richness to creamy saffron-infused desserts. As a gardener, growing your own saffron allows you to savor the unparalleled joy of indulging in culinary creations that bear the fruits of your labor.

    Beyond its culinary charm, saffron has been revered for its medicinal properties for centuries. This treasure trove of antioxidants and bioactive compounds offers a range of health benefits, including mood enhancement, stress reduction, and improved sleep quality. By growing saffron in your garden, you not only nurture your culinary desires but also promote wellness and holistic living.

    Growing Saffron

    Cultivating saffron presents an alluring adventure that sparks joy at every stage. Planting the Crocus Sativus bulbs in the fall sets the stage for months of anticipation, culminating in the breathtaking sight of saffron flowers blooming in autumn. The joy of carefully hand-harvesting the precious crimson stigmas creates a profound sense of accomplishment.

    Saffron is surprisingly adaptable and low maintenance, making it a perfect choice for gardeners of all levels. Its small space requirements allow it to thrive in containers, beds, or small garden patches, making it accessible for urban gardeners too.

    In an age of growing environmental consciousness, cultivating saffron aligns beautifully with eco-friendly gardening practices. The plant is resilient and requires minimal water, promoting water conservation. Additionally, saffron cultivation does not rely on harmful chemicals or pesticides, contributing to a healthier and more sustainable garden. 

    Additionally, saffron is beneficial to pollinators due to its vibrant purple flowers, which attracts bees, butterflies, and other insects, facilitating cross-pollination and promoting biodiversity in the ecosystem. The nectar-rich blooms serve as a valuable food source for these pollinators, supporting their populations and overall health. It benefits pollinators due to its vibrant purple flowers, attracting bees, butterflies, and other insects, promoting biodiversity in the ecosystem. 

    Apart from its intrinsic value as a culinary and medicinal treasure, saffron offers an enticing financial aspect to gardeners. As the world’s most expensive spice, the yield from a small saffron garden can command impressive returns, providing a unique opportunity to enjoy both natural and financial rewards. By growing saffron yourself, you can also avoid the high retail markups and potentially produce a substantial amount of the spice for personal use, leading to significant cost savings over time.

    To ensure a successful saffron cultivation, consider the following tips:

    Choose a sunny location with well-draining soil. Saffron thrives in a Mediterranean climate, but it can adapt to various environments, from zones 4-10.

    Plant saffron bulbs in late summer or early fall, placing them about 4 to 6 inches apart and 3 to 6 inches deep. Water the bulbs regularly during the growing season, but avoid overwatering to prevent bulb rot.

    Saffron flowers bloom in the fall, and the harvesting season follows closely. Be patient during the blooming period, and carefully hand-harvest the delicate crimson threads. Precise handling preserves the quality and value of the saffron stigmas.

    The appeal of saffron is not merely limited to its high price tag but extends to its rich history and culinary charm. As gardeners, growing saffron offers a delightful and rewarding experience that connects us with the ancient world while embracing the future of sustainable and luxury gardening. So, seize the opportunity to cultivate the world’s most expensive spice in your garden and witness the golden threads of saffron blossoming before your very eyes.

    What is Saffron?

    Saffron is the bright red stigma of the flower Sativus Crocus. The three saffron threads are removed from the flower and dried. The Flower is planted, harvested, and processed by hand. Making it the world’s most expensive spice. Saffron makes a healthy spice and is used to add color & flavor to many dishes- soups, seafood, rice, chicken, pastries, desert, butter, cheese, and so on.

  • Grow The World’s MOST EXPENSIVE Spice

    Grow The World’s MOST EXPENSIVE Spice

    In the world of gardening, there is a treasure waiting to be discovered – a treasure that not only captivates the senses but also holds immense value. We’re talking about saffron, the world’s most expensive spice, and we’re here to reveal why growing this golden gem in your garden is a decision that promises not only a mesmerizing horticultural journey but also the potential for great rewards. From its luxurious history to its culinary expertise and financial allure, let us entice you with the enchanting world of saffron and why it is a must-grow spice for every gardener.

    As a gardener, growing your own saffron allows you to savor the unparalleled joy of indulging in culinary creations that bear the fruits of your labor.

    About us

    Located in the Southern California Mojave Desert. We are considered one of the largest Saffron farms on the west coast, with only a handful of Saffron farms located in the USA. Most of the USA’s Saffron is imported from oversea’s. Iran being the largest producer, supplying 90% of the world’s Saffron. We have a very similar climate to Iran, which is why our saffron thrives here in the Southern California Mojave Desert.

    What is Saffron?

    Cultivating the world’s most expensive spice in your garden!

    Saffron is the bright red stigma of the flower Sativus Crocus. The 3 Saffron threads are removed from the flower and dried. This flower is planted, harvested, and processed by hand. Making it the worlds most expensive spice. Saffron makes a healthy spice and is used to add color & flavor to many dishes- soups, seafood, rice, chicken, pastries, desert, butter, cheese, and so on.

    Our Vision

    Our hope is not only to supply our community with this amazing spice, but also to bring awareness to the world of farming and agriculture.

    As gardeners, we seek exciting and fulfilling experiences that foster a deeper connection with nature. Cultivating saffron presents an alluring adventure that sparks joy at every stage. Planting the Crocus Sativus bulbs in the fall sets the stage for months of anticipation, concluding in the breathtaking sight of saffron flowers blooming in autumn. The joy of carefully hand-harvesting the precious crimson stigmas is unparalleled, creating a profound sense of accomplishment.

    Saffron is surprisingly adaptable and low maintenance. Once established, the Crocus Sativus plant requires minimal care, making it a perfect choice for gardeners of all levels. Moreover, its small space requirements allow it to thrive in containers, beds, or small garden patches, making it an accessible option for urban gardeners as well.

    In an age of growing environmental consciousness, cultivating saffron aligns beautifully with eco-friendly gardening practices. The plant is resilient and requires minimal water, promoting water conservation. Saffron cultivation does not rely on harmful chemicals or pesticides, contributing to a healthier and more sustainable garden. Additionally, saffron is beneficial to pollinators due to its vibrant purple flowers, which attracts bees, butterflies, and other insects, facilitating cross-pollination and promoting biodiversity in the ecosystem. The nectar-rich blooms serve as a valuable food source for these pollinators, supporting their populations and overall health.

    We are quickly approaching the short planting window for saffron(Sativus Crocus). One amazing benefit to planting Sativus Crocus is that you get an immediate harvest. Unlike most bulbs that require you wait until the following growing season or next year for your first harvest. Saffron is typically planted between August-October and harvested October-December.

    WHY GROW SAFFRON?

    • You can grow Saffron (Crocus Sativus) from zones 4-10.
    • Saffron is a fall blooming crocus. Planting between Aug-Oct & harvesting Oct-Dec.
    • Saffron is the most expensive spice.
    • Saffron corms reproduce- new corms grow on old corms.
    • Saffron provides taste & is a powerful dye.
    • Saffron is a beautiful flower with a bright red & yellow pistil. When dried, these red stigmas make up the highly valuable spice, called Saffron.
    • Saffron doesn’t require much water or nutrition. It’s an easy plant to care for.
    • Saffron has very interesting medicinal properties.
    • When stored well, saffron can be kept for many years.
    • Saffron is a unique addition to the home garden, blooming in October-December.
  • How to Preserve and Use Dried Flowers

    How to Preserve and Use Dried Flowers

    Today I’m sharing how to preserve your spring blooms and enjoy them all year long! Create colorful flower confetti or sprinkles. Infuse honey and oils, add to syrups, teas, or salads. Think outside the box and harvest seed pods for wild & fun bouquets!

    As my garden began to expand and my love for growing flowers increased, I found myself using my dehydrator more and more. It started with drying herb and vegetables, but quickly moved onto drying and preserving flowers. You can hang dry flowers, like lavender and roses, but sticky flowers like calendula- I prefer to dry in the dehydrator.

    As spring approached and our moving date draws closer, I began drying as many blooms as I could. This year I wasn’t focusing my time on planting seeds or hardening off seedlings, but I found myself still gravitating to the garden. I discovered that harvesting isn’t just for the summer months, spring offers an abundance as well.

    By harvesting your flowers continuously, you not only get to use those blooms to create with, but you also encourage the plant to produce more blooms. This creates new growth and provides continual blooms, by deadheading flowers regularly. Deadheading transfers the plant’s energy from seed production to bloom creation. This also helps make your flowering plants look nicer, as dead flowers turn brown and drop all their petals.

    Check out my flower guide, BLOOM – A Flower Seed Starting Guide, HERE!

    There are so many uses for fresh & dried flowers:

    • Calendula- Salve, sprinkles, infused oil
    • Rose- Rose water
    • Lavender- Syrups, scented sachets
    • Chamomile- Tea, infused honey
    • Lilacs- Syrups
    • Borage- Edible details, on cream cheese or fruit trays.
    • Nasturium- Salad
    • Marigold- Salad
    • Dandelion- Tea, infused oil
    • Sunflower- Salad

    How to make a colorful flower confetti mix:

    This might seem obvious, but plant different colors and shades of flowers. This doesn’t mean that you need every shade of rose or lilac bush. For example, I have 2 varieties of purple lilacs and 1 white lilac. I have a white rose bush, a red and also a yellow rose. Between those 6 bushes, I have a great variety of colors. In the spring, I’m able to harvest those blooms and store them as I wait for my summer blooms to come in- marigolds, calendula, sunflowers, lavender, and so on. I like to harvest full flowers and pedals, to create texture, this also gives life and beauty to your confetti mix.

    Bouquets

    Dried flower bouquets are one of my favorite gifts to give, because they last forever. Flowers like Lavender have beautiful long stems, making it easy to harvest and dry. I almost always send friends and family home, after visiting, with a little lavender bouquet. When your harvesting flowers to dry for a bouquet, keep in mind that you’ll want long stems and hang them upside down or lay them flat on a counter top. You’ll want to use strong, long stem flowers, but don’t be afraid to get creative, use what you have and forage for the rest! I have collected eucalyptus in parking lots with friends, walked to neighboring empty lots and harvested desert blooms. Consider using dill or carrot flowers, chive stems and blooms, radish flowers, and even seed pods- poppy, dill, onion, to create an interesting & fun bouquet.

    Dehydrator Instructions:

    1. Harvest flowers.
    2. Place evenly on drying rack.
    3. Set your dehydrator for 16 hours at 100 degrees, or overnight.
    4. I like to store my flowers in a cardboard box or brown paper bag to prevent moisture or mold growth. If you are confident the whole flower is completely dry, you may store them in glass jars. I typically will only store my flowers in glass jars, if I am infusing them- oils or honey.

    I’d love to hear from you, what flowers will you be preserving this year?

    And how do you plan on using them?

  • How To Make Calendula Salve

    How To Make Calendula Salve

    Calendula has amazing medicinal properties, and is commonly used in salves & tea’s. Aside from its amazing medicinal properties, the blooms are beautiful and abundant throughout the growing season. In fact, calendula has to be one of my favorite plants to grow, because it’s so easy to maintain & the blooms are endless! By pinching the tops of your flowering stems, you’ll get twice as many flowers, and when the season is over collect the seeds by removing husks or pods and store in a brown paper bag away from any moisture.

    Calendula is easy to grow and should be planted after your last frost date. Calendula is an edible flower and will continue to provide new blooms as you harvest them. This encourages the plant to create more branches around the base, increasing the amount of flowering stems. Fertilizing will also help extend your blooming season.

    If your looking for a more in-depth guide, check out Bloom- A Flower Seed Starting Guide. This guide is designed to help you succeed in growing beautiful blooms! Covering annuals, biennials, perennials, bulbs and tubers.

    Harvesting your blooms is really simple. Pinch just under the head of the flower/bloom and place the flowers face down on a drying rack or counter top to dry. Allow them to completely dry at room temperature or on low within a dehydrator. Be sure your flowers are completely dry before storing them together or they will mold. Once you have enough blooms you can begin to process of making Calendula Salve.

    CALENDULA INFUSED OIL

    • 1 half pint (8 oz) jar of dried calendula flowers (*Note: you want to use the whole flower)
    • 1/3 cup olive oil
    • 1/3 cup coconut oil
    • 1/3 cup sweet almond oil or vitamin E oil
    1. Pinch just under the head of the flower/bloom and place the flowers head down on a drying rack or counter top. Allow them to completely dry at room temperature or on low within a dehydrator. Be sure your flowers are completely dry before storing them together or they will mold.
    2. Fill 1 half pint (8 0z) jar with calendula flowers. Cover them with olive, coconut(melted), and sweet almond or vitamin E oil.
    3. Store calendula infused oil in a pantry or dark place for 2-4 weeks.
    4. Strain the flowers.

    CALENDULA SALVE

    • 6 half pint jars of calendula infused oil, strained
    • 5 oz beeswax pellets
    • 5 oz refined shea butter
    1. You’ll be creating a double boiler- Bring a large pot of water to a simmer. Place a stainless steel or glass bowl inside the pot of bowling water.
    2. Fully dissolve the beeswax and calendula infused oil, stirring occasionally.
    3. Add the refined shea butter and stir until it’s completely dissolved.
    4. Let cool for just a few minutes before handling the hot bowl. Carefully pour the mixture into 4 oz jars or back into your 8 oz jars. This recipe makes approximately 12- 4 oz jars or 6- 8 oz jars.